Connect with us

Fashion

DIY Earrings: Craft Unique Jewelry That Reflects Your Style

Published

on

Earrings

Jewelry has a unique way of telling our story. Among all the dazzling options, earrings often steal the show. They can elevate any outfit and reflect your personality in ways that other accessories can’t. But why settle for mass-produced pieces when you can create something truly one-of-a-kind? Crafting your own earrings not only allows you to showcase your creativity but also gives you the chance to wear accessories that are as unique as you are.

Imagine stepping out with a pair of handcrafted earrings that no one else owns. The thrill of wearing personalized designs made by your own hands is unmatched. Whether you’re looking for bold statement pieces or delicate studs, DIY earrings offer endless possibilities. Let’s dive into the art of crafting unique ear adornments that will enhance your jewelry collection and inspire those around you!

Own Earrings the Ultimate Personalization

Crafting your own earrings offers a unique opportunity to express your personal style. Unlike store-bought options, DIY earrings allow you to incorporate colors, shapes, and materials that resonate with you. Every piece becomes a reflection of your individuality.

When making earrings at home, the possibilities are endless. You can mix and match various components like beads, wires, or charms to create something truly one-of-a-kind. Whether you’re drawn to boho-chic designs or minimalist elegance, customization is key.

Moreover, crafting provides an emotional connection to each piece. As you assemble the elements together—perhaps from memories or experiences—you infuse them with meaning. Each time you wear these creations, they tell a story only you know.

Personalization doesn’t just elevate aesthetics; it also enhances sentimentality. Wearing handcrafted earrings transforms ordinary moments into something special as they carry pieces of who you are and what inspires you daily.

Essential Tools and Materials for DIY Earrings

Creating your own earrings can be a rewarding experience, but having the right tools and materials makes all the difference. Start with basic jewelry-making tools: round-nose pliers, wire cutters, and flat-nose pliers are essential for shaping and cutting wires. These tools allow you to manipulate metal findings easily.

Next, gather your materials. You’ll need ear wires or hooks as a base for dangle earrings. Beads in various shapes and colors can add flair to your designs. Don’t forget about spacers or charms that can elevate the look further.

Consider adding some unique elements like resin or polymer clay components if you’re feeling adventurous. These materials offer endless design possibilities, allowing you to craft truly one-of-a-kind pieces.

Invest in a bead mat to keep everything organized while you work. This will help prevent beads from rolling away and losing important components during crafting sessions.

Step-by-Step Guide to Creating Your Own Earrings

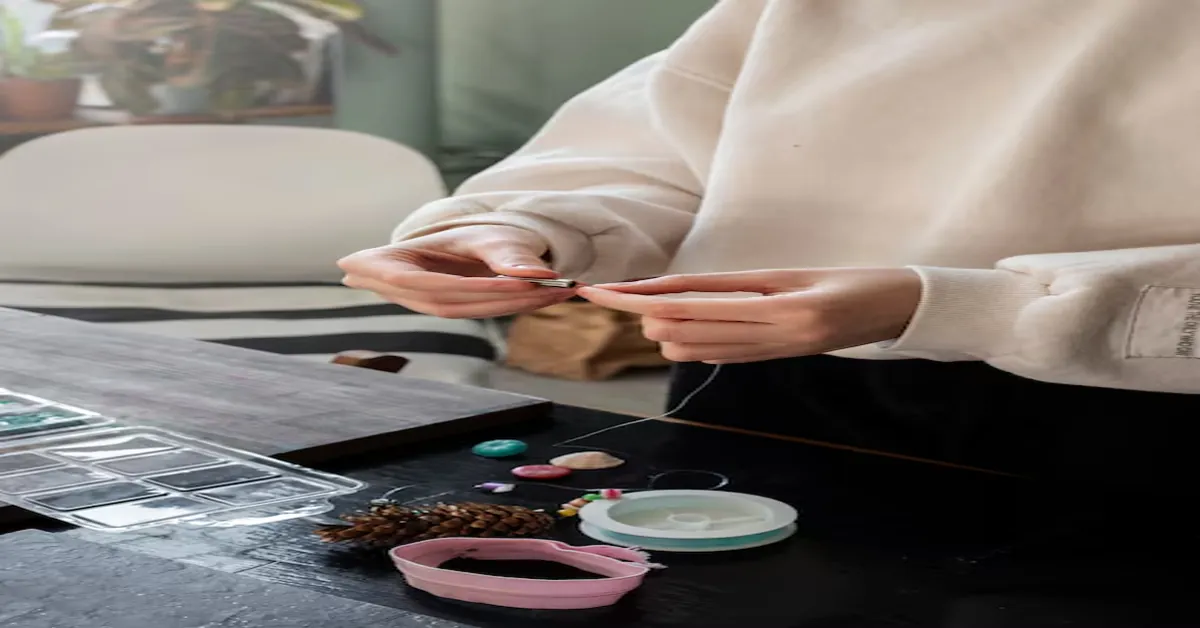
Creating your own earrings can be a rewarding experience. Start by gathering your materials: earring hooks, beads, wire, and pliers. Choose colors and shapes that resonate with you. This is where creativity takes flight.

Next, cut the wire to your desired length. A common choice is around three inches for dangle earrings. Thread on your chosen beads in a pattern that appeals to you. Don’t hesitate to mix textures or sizes for added interest.

Once satisfied with the bead arrangement, create a loop at one end of the wire using round-nose pliers. This secures the beads in place while allowing you to attach it to the earring hook easily.

Open up the jump ring attached to an earring hook and thread it through your loop before closing it tightly again. Repeat this process for the second earring, ensuring both are symmetrical or uniquely different based on your style preferences!

Inspiration for Unique Designs

Finding inspiration for unique earring designs can be an exciting adventure. Nature is a fantastic starting point. Look at the colors and shapes around you—flowers, leaves, and even ocean waves can spark creativity. Take photographs during your walks to remember those beautiful moments.

Art and fashion trends are another source of ideas. Browse through magazines or visit galleries to see what catches your eye. The patterns and textures in various artworks might inspire new combinations for your earrings.

Don’t forget about cultural influences. Explore traditional jewelry from different regions worldwide; these styles often have rich stories behind them that can inform your own creations.

Consider using everyday objects as inspiration. Vintage buttons or pieces of fabric lying around could transform into stunning earrings with just a bit of imagination and craftsmanship involved in DIY projects! Let your mind wander free, and allow yourself to experiment with unconventional materials too.

Tips for Beginners and Advanced Crafters

When starting your journey into DIY earrings, keep it simple. Choose beginner-friendly materials like beads and hoops. Experiment with different colors and shapes to find what you love. Don’t worry about perfection; each piece will improve your skills.

For those more experienced, challenge yourself with intricate designs. Try wire wrapping or using resin for a unique touch. Explore mixed media by combining leather, wood, or metal elements in your creations.

Investing in quality tools can make a significant difference at any skill level. A good pair of pliers, cutters, and storage solutions can enhance precision and organization while crafting.

Join online forums or local craft groups to share ideas and get feedback on your work. Engaging with fellow crafters can inspire new techniques and provide motivation as you create stunning earrings that reflect your personal style.

Caring for Your Handcrafted Earrings

Caring for your handcrafted earrings ensures they remain stunning pieces in your collection. Start by storing them properly. Use a jewelry box with compartments or soft pouches to prevent tangling and scratching.

Cleaning is essential, especially if you wear them often. A gentle wipe with a microfiber cloth can remove dirt and oils without damaging the finish. For more delicate materials, consider using specific cleaning solutions designed for jewelry.

Avoid exposing your earrings to harsh chemicals found in perfumes or household cleaners. These substances can tarnish metals and affect gemstones. It’s best to apply any beauty products before putting on your earrings.

Be mindful of how you handle them. Remove your earrings when swimming or exercising to avoid unnecessary stress on the components. With proper care, these unique creations will maintain their charm and continue elevating your style for years to come.

Showcasing Your Collection

Once you’ve crafted your unique earrings, the next step is showcasing them. Displaying your collection can be as creative as creating the pieces themselves. Consider using a decorative jewelry box or a shadow box frame to highlight your favorite designs.

Another great option is to invest in an earring stand or tree. These not only keep your creations organized but also allow you to display them beautifully on a dresser or vanity. A well-arranged display can serve as both functional storage and eye-catching decor.

Social media platforms like Instagram are perfect for sharing your work with friends and followers. Use high-quality photos that capture the details of each piece, making sure to incorporate natural light for the best results.

Participating in local craft fairs or markets can also help showcase your earrings beyond just online platforms. This allows potential customers to see and feel the quality of your handmade items while connecting with other crafters in your community.

READ MORE:CumOnPrintedPics: Memories into Personalized Keepsakes

Conclusion

Creating your own earrings is not just a craft; it’s an opportunity to express yourself. By personalizing each piece, you can showcase your style and creativity like never before. As you explore different materials and techniques, you’ll discover the joy of crafting something truly unique.

Don’t be afraid to experiment with designs that resonate with you. Whether you’re a beginner or have some experience under your belt, every pair of earrings tells a story—your story.

Remember to care for these handcrafted treasures so they remain beautiful over time. Showcasing them in fun ways can also inspire others on their DIY journey.

So gather those tools and let your imagination run wild! Your next favorite accessory is waiting to be created right at home.

Continue Reading
Click to comment

Leave a Reply

Your email address will not be published. Required fields are marked *

Fashion

Snake Tattoo Guide: Meaning, Designs & Aftercare Tips

Published

on

Snake Tattoo

Some have said snake tattoos are some of the most fascinating tattoos to behold for some tattoo aficionados overtime-their long bodies, deep symbolism, and good looks tell stories that are as varied as the people who wear them. Whether you’re interested in them because they signify change or because you love how they seem to slither on your skin, caring for your snake tattoo is important to keep it alive and well for many years.

This guide will cover everything from the perfect design choice to ensuring those pieces of art stay beautiful for many years. So, if you are ready to bring out your inner serpent and shine those scales brighter, let us see how to keep nurturing the beautiful artwork!

Understanding Snake Tattoos

Snake tattoos have a long-standing history and vary in meaning from one culture to another. For many cultures, snakes are symbols of transformation and renewal as they shed their skin. This shedding serves as a powerful metaphor for personal growth, making snake tattoos popular with those who are celebrating changes in their lives.

Snakes, along with transformation, are symbols of wisdom and higher knowledge. In many mythological contexts, they act as guardians of ancient wisdom and symbols of enlightenment. This duality, in turn, can invite many people to identify with the idea.

With that, there is an endless list of possibilities of designs for snake tattoos. They could go the full-color approach, or they could settle for simple black line work-never-the-less-your snake tattoo can carry your individual taste. It can coil around flowers or twist itself together with skulls or mandalas; every tattoo tells its own story.

On its part, the culture contributes to the luring factor of snake tattoos. For instance, snakes symbolize protection and fertility within Eastern faiths like Hinduism and Buddhism. Western interpretations, meanwhile, may consider them dangerous or tempting.

All these layers enrich the consciousness surrounding choosing the snake tattoo. Whether it is in great form or symbolically-whether perhaps both classically symbolically interesting creature, it has got endless inspiration to offer bordering on the skin.

Choosing the Right Design

Differences in choosing one snake tattoo from another are an important landmark. From rebirth to danger, there are many meanings to be attributed to a snake. Choose which of these personal meanings reflects best upon you. Look up the major styles out there: traditional, watercolor, neo-traditional.

Consider size and placement on your body. A big piece can wrap around limbs, while small designs may suit the wrist or ankle. Depending on placement, you may see it regularly or hardly at all, but others may comment on it.

And let’s not forget about colors! Snakes are found in all kinds of colors. Bright green and yellow make statement pieces, while black and grey have a classic edge. Pick colors that complement each other, of course!

Don’t forget about color options! Snakes come in a variety of hues in nature; vibrant greens and yellows make bold statements while black and gray offer a more classic look. Choose colors that complement each other and reflect your personality.

Custom designs are also worth considering if you’re looking for something unique. Work with an experienced tattoo artist who understands symbolism and artistry to create a one-of-a-kind piece just for you.

Take inspiration from history or mythology surrounding snakes. From ancient cultures to modern interpretations, there’s a rich tapestry of stories that can inform your design choice, making it even more meaningful in the long run.

Preparing for and Getting Your Snake Tattoo

Preparing for your snake tattoo is a crucial step in ensuring you get the best results. Begin by researching reputable tattoo artists who specialize in this type of design. Look at their portfolios to find an artist whose style resonates with what you envision. Read reviews and ask for recommendations from friends or online communities.

Once you’ve chosen an artist, schedule a consultation. This is your chance to discuss ideas, placement, and size. Bring reference images that inspire you but also be open to your artist’s suggestions. They can provide valuable insights on how the design will look on your skin.

On the day of your appointment, make sure you’re well-rested and hydrated. Avoid alcohol or any blood thinners that could interfere with the process. Wear comfortable clothing that allows easy access to the area where you’ll be getting inked.

Arrive slightly earlier than scheduled so you can relax before starting. This helps ease any nerves and gives you time to go over final details with your artist if needed. Don’t hesitate to voice any concerns during this time; clear communication ensures everyone is on the same page.

During the session itself, focus on staying calm and still as much as possible. Remember that it’s okay to take breaks if necessary—your comfort should always come first while creating a stunning snake tattoo that reflects your individuality.

Aftercare Tips for Your New Snake Tattoo

Proper aftercare is really important after getting a snake tattoo to ensure that it eventually heals in good quality. The first thing to do is leave your bandage on as long as your artist recommends- at least for a couple of hours- so that the fresh ink is protected from bacteria and irritation.

On removing the bandage, the first thing to do is gently wash the area under lukewarm water and mild soap. Don’t scrub; just use your hands in a soft motion. Pat it dry with a clean towel-don’t rub! Keeping this area clean will help prevent infections.

Apply a thin layer of unscented moisturizer or specialized tattoo ointment. Using certain products especially made for tattoos would work well because they heal and do not cause harm to the skin. For several times on a day, repeat this, but do not over-moisturize.

In fact, about two weeks are the healing period of time. Do not soak your tattoo in pools or hot tubs during this period. The introduction of harmful bacteria through swimming with open dermis will definitely compromise the vibrancy of your design.

Every urge to pick at the scabs or peel at the healing skin should be ignored. These layers will naturally fall off, ensuring that the integrity of your snake tattoo is maintained while still looking amazing for the long haul.

Long-Term Care and Maintenance

Long-term care is crucial for keeping snake tattoos looking fresh and bright. Keeping them away from the sun is key. UV rays can cause fading, so applying sunscreen on exposed tattoos while in the sun is necessary. A broad-spectrum SPF 30 or higher will protect your artwork from unfavorable effects.

Hydration enhances the elasticity of your skin as well. Water is your best friend in keeping healthy skin that allows the tattoo to sit well over time. Moisturizers with shea butter or coconut oil can also be helpful here.

Exfoliation can also help preserve your snake tattoo. A gentle scrub of the area around the tattoo for a maximum of once a week is effective for the removal of dead skin without irritating the new ink. Make sure the exfoliant is apt for sensitive skin to prevent any complications.

Whatever you do, leave any scabs alone; picking at them will only accelerate damage to the ink and surrounding skin in the long run. Letting blemishes heal naturally will allow you to shine in your design.

Schedule the odd refresh at a reputable artist’s studio every two years if you notice fading or wearing in specific areas. A quick fix can help your snake tattoo sparkle once again and look great for years.

Touching Up and Enhancing Your Snake Tattoo

With time, your snake tattoo may require a touch-up now and then to retain its beauty. Fading is a natural phenomenon-a constant in the world of tattoos: due to sun exposure, skin changes, or just the passage of time. It is time to retouch when you see a design losing its vibrancy or sharpness.

Finding someone who really knows tattoo restoration is important. The Tattoo artist should know how to touch up the tattoos without changing too much of the original design. Part of the restoration process could be reinforcements of the background colors or adding additional colors to bring back the contrast of the old lines.

Prepare well for the retouch session, taking care of skin condition and hydration. Keeping skin hydrated ensures ink absorption and an excellent result. The more water you drink before your appointment, the better.

You might want to consider building upon this evolution by including designs that go along nicely with your snake tattoo! Flowers, geometric motifs, or other symbols of significance to you could take it even further! These additions to the tattoo breathe fresh air into it while simultaneously creating something that is very much unique to you.

Proper aftercare is a must now again for anything that has been added. Treating your fresh ink well ensures longevity and that those bright and fresh colors shine.

Doing periodic maintenance of how your snake tattoo looks through time is important in making sure that it is still beautiful and relevant in your life- just as beautiful as the day it was born!

Continue Reading

Fashion

Stunning Braid Hairstyles for Every Hair Type and Length

Published

on

Braid Hairstyles

Indeed, braid hairstyles are eternal. Old traditions and modern glamour runways recognize braid hairstyles as evergreen in the beauty and culture worlds. There are countless braids for every occasion, from a protective style to a polished updo as well as an everyday, fun hairstyle. This guide will cover the best braid hairstyles, what looks good for your hair type, tips on styling, and much more.

You might be wondering, why such huge popularity of Braid Hairstyles?

Braid is a combination of useful utility and aesthetics. It is really fashionable and easily manageable. Besides that, it’s a great damage protection measure against heat or harsh weather. They carry meanings as well: African heritage, Viking warriors, and boho-chic festival scenes.

They include:

Laxity, in terms of styling.

Suitable for all types of hair.

Options versatile for any occasion.

Best for protective styling.

Types of Braid Hairstyles

Let us explore the most popular and loved braid styles that continue to rule everyday fashion and red carpets with strong competition.

Box Braids

This is a classic-style protective hairstyle that is very famous for people with natural or textured hair. To make box braids, the hair is divided into squares, and each piece is braided from the roots to the ends.

LSI keywords: knotless braids, jumbo box braids, small box braids

French Braids

This elegant braid is also known as the three-strand braid, which starts with the crown and clothed very close to the scalp. Suitable for informal and formal events.

Dutch Braids

People typically refer to such hair as reverse French braids; in fact, they pop out because they look prominent. This is an all-time favorite for those who spend most of their time at the gym and sporty look.

Cornrows

Cornrows are tightly braided along the scalp to form rows, thus being highly stylish and cultural besides serving for protective styling purposes.

Variations include:

Straight-back cornrows

Zigzag patterns

Feed-in cornrows

Fishtail Braids

They are made by dividing the hair into two sections and weaving small pieces from each side alternately. This one is perfect for formal occasions or Instagram-worthy styles.

Crown Braid

Best for weddings or summer picnics. The braid then wraps around the head like a halo and gives a very romantic and royal feel.

Waterfall Braids

A stunning half-up half-down style that creates bangs as you braid but leaves pieces out that cascade down like a waterfall.

With Best Braid Hairstyles for Every Hair Type

You can easily define an ideal braid for being locked in place, crisply visible, and manageable according to your very own texture.

For Curly Hair:

Best Styles: Box Braids, Flat Twists, Goddess Braids

Leave-in conditionerer before you braid, so moisture is preserved.

For Straight Hair:

Best Styles: French, Dutch, Fishtail

Use texture spray to hold braids in place and keep them from slipping.

For Fine Hair:

Crowns are fine styles or waterfalls that build volume.

Pancaking (loosening the braid) creates the effect of fuller hair.

For Thick Hair:

Be bold enough to sport jumbo box braids or double Dutch braids.

Use sectioning clips for handling hair while styling.

Braid Hairstyles by Hair Length

You don’t need waist-length hair to enjoy braids. Here’s how to make it work for your length.

Short Hair

  • Options: Mini cornrows, finger coils, braided bangs
  • Tip: Add hair extensions for fuller looks like box braids or twists.

Medium Hair

  • Options: Half-up Dutch braids, halo braids, braided ponytails
  • Ideal for most styles without added hair.

Long Hair

  • Options: Layered fishtail, crown braids, feed-in braids
  • Long hair allows more creativity with patterns and length-based styles.

African Hair Braid Styles

Decorative styles not only prevent breakage but also assist natural hair to fasten growth and protect it from the environmental factors.

Top Protective Braid Hairstyles:

Box braids

Senegalese twists

Marley twists

Flat Twists

Cornrow Extensions

Care tips:

Regularly moisturize your scalp

Sleep in a satin or silk scarf

Do not keep braids on for over 6 to 8 weeks

Braid for Special Occasions

Braid up your hair for special occasions such as wedding ceremonies, proms, and corporate galas.

Stylish braid hairstyles:

Bohemian beads accessories braids

Side fishtail pearls

Crown braid updos

Braided low buns with veil attachments

Styling tip: For more glam, use braid cuffs, jewels, or fresh flowers.

How To Maintain Braids

Having a superb braid today does not guarantee a stunning look tomorrow-unless maintained well.

Gab Maintenance Checklist:

Clean scalp: Use a dry shampoo or diluted apple cider vinegar spray

Hydration: Light oil, such as (argan, jojoba) on scalp

Control Frizz: Refreshing mousse or braid sheening spray

Overnight Protection: Sleeping in satin scarf or bonnet

Homemade and professional tips for braid diy

Are you not a braiding professional, then just work your way around the simple and easy ones. You don’t have to go to a saloon to achieve an amazing braided style.

Equipment templates:

Rat-tail comb

Sectioning clips

Edge control gel

Detangling brush

Bobby pins

Beginner Braids:

Three-strand basic braid

Side braid

French braid

Half-up braid crown

Pro Tip: Watching tutorials on YouTube or TikTok can fast-track your learning.

Conclusion: Find Your Perfect Braided Look

Whether you’re rocking a crown braid for a wedding or quick cornrows for daily wear, braid hairstyles offer endless variety, practicality, and beauty. With the right technique and maintenance, braids can be both stylish and protective. Don’t be afraid to experiment—your perfect braid might just be the next one you try!

FAQ About Braid Hairstyles

Q1: How long should I keep my braids in?
A: Most protective braid styles can last 4–8 weeks, depending on hair type and care.

Q2: Do braids damage hair?
A: Not if done properly. Avoid tight braiding, over-manipulation, and always moisturize.

Q3: Can I swim with braids?
A: Yes! Just rinse hair afterward and moisturize to prevent dryness from chlorine or saltwater.

Q4: Are braids suitable for formal events?
A: Absolutely. Many braid styles like crown braids, updos, and fishtails are perfect for weddings, proms, or galas.

Q5: How do I stop my braids from frizzing?
A: Use anti-frizz spray, avoid excessive water exposure, and sleep with a silk scarf or pillowcase.

Continue Reading

Fashion

Hair Transplant Cost: Pricing, Factors & What to Expect

Published

on

Hair Transplant Cost

Hair loss affects millions of people worldwide, leading many to consider a hair transplant as a permanent solution. But one of the most common questions is: How much does a hair transplant cost? The price varies depending on several factors, including the type of procedure, clinic location, and the extent of hair loss. In this guide, we’ll explore the costs, influencing factors, and what to expect from the procedure.

How Much Does a Hair Transplant Cost?

The cost of a hair transplant typically ranges between $4,000 and $15,000 in the United States. However, prices can be lower in countries like Turkey and India, where high-quality procedures are available at a fraction of the cost.

Average Hair Transplant Costs by Country

CountryAverage Cost (USD)
USA$4,000 – $15,000
UK$5,000 – $12,000
Turkey$1,500 – $5,000
India$1,000 – $4,000
Canada$6,000 – $14,000
Australia$5,500 – $13,000

Factors That Influence Hair Transplant Cost

1. Type of Hair Transplant Procedure

There are two primary types of hair transplant methods:

  • FUE (Follicular Unit Extraction): Individual hair follicles are extracted and implanted. Less scarring, but more expensive.
  • FUT (Follicular Unit Transplantation): A strip of scalp is removed and implanted. More affordable but leaves a visible scar.

2. Number of Grafts Needed

Hair transplant costs are often calculated per graft. On average, a single graft costs between $2 and $10, and patients typically need between 1,000 to 4,000 grafts, depending on their level of hair loss.

3. Surgeon’s Expertise and Reputation

Experienced, board-certified surgeons charge more due to their expertise and success rates. A highly skilled surgeon can deliver natural-looking results, making the investment worthwhile.

4. Clinic Location

Clinics in major cities and developed countries generally charge more due to higher operational costs. Many people travel to countries like Turkey for affordable yet high-quality procedures.

5. Additional Costs

Aside from the procedure, you may incur costs for:

  • Consultations
  • Pre-operative tests
  • Post-surgery medications
  • Follow-up sessions

Are Hair Transplants Covered by Insurance?

Most insurance companies do not cover hair transplants as they are considered cosmetic procedures. However, medical financing options and payment plans are available at many clinics.

Is Traveling Abroad for a Hair Transplant Worth It?

Many people opt for medical tourism in countries like Turkey, where clinics offer packages that include:

  • The hair transplant procedure
  • Hotel accommodation
  • Airport transfers
  • Post-surgery care

This can significantly reduce costs while ensuring high-quality results.

Conclusion

The hair transplant cost varies widely based on location, procedure type, and surgeon expertise. While it can be expensive, the long-term benefits often outweigh the costs. If you’re considering a hair transplant, research reputable clinics and consult with specialists to determine the best approach for you.

Frequently Asked Questions (FAQ)

1. How long does a hair transplant last?

A successful hair transplant is permanent, as transplanted hair follicles continue to grow naturally.

2. Is the procedure painful?

Hair transplants are performed under local anesthesia, making them virtually painless. Some discomfort may occur post-surgery.

3. How soon will I see results?

New hair growth starts around 3-6 months post-procedure, with full results visible in 12-18 months.

4. Can women get hair transplants?

Yes, hair transplants are effective for both men and women experiencing hair loss.

Continue Reading

Trending