Connect with us

Fashion

Phoenix Tattoo: Meaning, Designs, and Best Placement Ideas

Published

on

Phoenix Tattoo

The phoenix tattoo is one of the most powerful and symbolic tattoo designs in the world. This mythical bird, known for its ability to rise from its own ashes, represents rebirth, transformation, strength, and resilience. With deep historical and cultural significance, the phoenix is a popular choice for those looking to mark a significant life change or symbolize personal growth.

In this article, we will explore the history and meaning of the phoenix tattoo, different design variations, popular placements, and essential tips for getting one. Whether you’re looking for a small minimalist phoenix or an elaborate full-back design, this guide will help you make an informed decision.

What Does a Phoenix Tattoo Symbolize?

The phoenix tattoo carries profound meanings, making it a favored choice for individuals looking for an inspiring and personal design. Some of the most common symbolisms include:

  • Rebirth & Renewal – The phoenix rises from ashes, symbolizing new beginnings and personal transformation.
  • Strength & Resilience – It represents the ability to overcome challenges and emerge stronger.
  • Immortality & Eternal Life – The phoenix’s cycle of death and rebirth signifies eternal existence and regeneration.
  • Triumph Over Adversity – Many choose a phoenix tattoo to mark victories over difficult circumstances, such as illness, addiction, or personal struggles.
  • Spiritual Growth – The phoenix is often associated with enlightenment, self-discovery, and spiritual awakening.

The Mythology and History Behind the Phoenix

The legend of the phoenix dates back thousands of years and is present in various cultures across the world:

  • Ancient Egyptian Mythology – The Bennu bird, often associated with the sun god Ra, was believed to represent renewal and the cycle of life.
  • Greek & Roman Mythology – The phoenix was described as a magnificent bird that lived for centuries before setting itself on fire and being reborn from the ashes.
  • Chinese Culture – The Fenghuang, or Chinese phoenix, symbolizes virtue, harmony, and prosperity. It is often paired with the dragon in Chinese art.
  • Japanese Mythology – The HĹŤ-ĹŤ, a phoenix-like bird, represents justice, fidelity, and protection.

Phoenix Tattoo Design Ideas

There are countless ways to personalize a tattoo. Here are some of the most popular styles:

1. Traditional Phoenix Tattoo

  • Inspired by classic tattoo styles with bold lines and vibrant colors.
  • Often features flames, clouds, or intricate feather details.

2. Realistic Phoenix Tattoo

  • Uses hyper-detailed shading and color gradients to create a lifelike bird.
  • Best suited for larger tattoos on the back, thigh, or chest.

3. Minimalist Phoenix Tattoo

  • Features simple linework or a small geometric shape.
  • Perfect for first-time tattoo seekers or those who prefer subtle designs.

4. Japanese Phoenix Tattoo

  • Inspired by Irezumi (traditional Japanese tattooing) with dramatic waves, flames, and cherry blossoms.
  • Often covers the back, sleeve, or leg.

5. Watercolor Phoenix Tattoo

  • Uses soft brush strokes and vivid colors to mimic watercolor paintings.
  • A modern take on the phoenix design, giving it an artistic and fluid appearance.

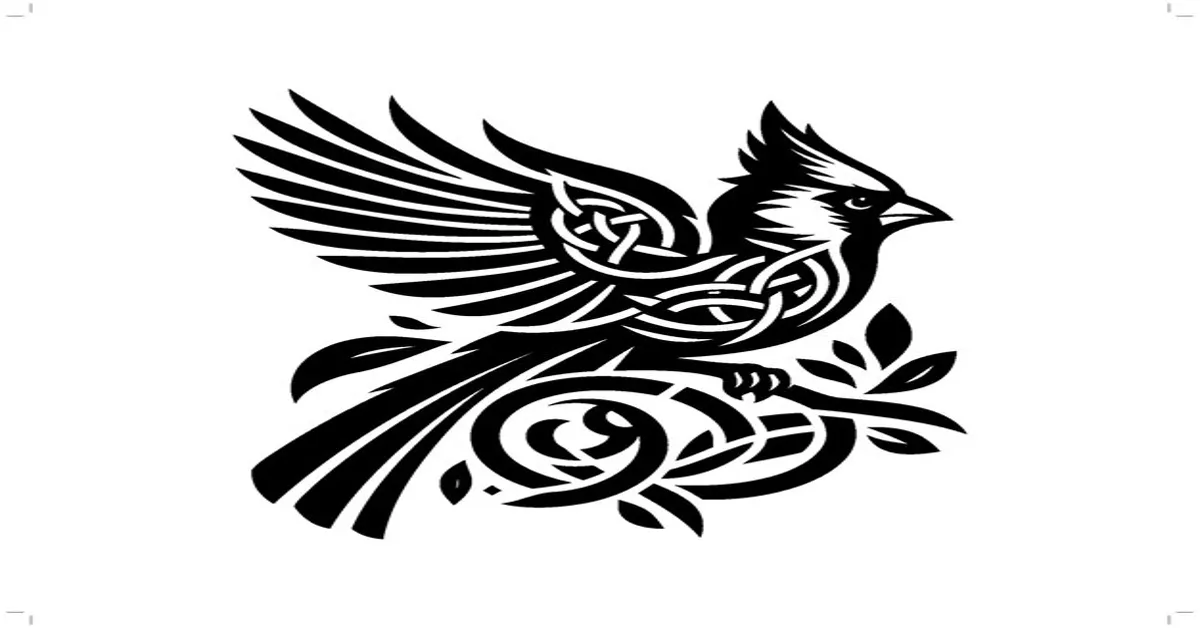
6. Tribal Phoenix Tattoo

  • Incorporates bold black tribal patterns with the shape of a phoenix.
  • Common among those who prefer blackwork tattoos.

Best Placements for a Phoenix Tattoo

The placement of a phoenix tattoo depends on the size and style of the design:

  • Back – Ideal for large, detailed phoenix tattoos, often showing the wings fully spread.
  • Arm or Sleeve – Great for dynamic designs that incorporate flames and intricate details.
  • Chest – Symbolizes protection and personal transformation, making it a powerful placement choice.
  • Thigh – Provides a large canvas for detailed phoenix designs.
  • Wrist or Ankle – Perfect for small minimalist tattoos.

Choosing the Right Artist for Your Phoenix Tattoo

When selecting a tattoo artist, consider the following:

  • Experience in Phoenix Designs – Look for an artist who specializes in mythological or bird tattoos.
  • Portfolio & Reviews – Check their past work to see if their style matches your vision.
  • Hygiene & Safety Standards – Always choose a professional tattoo studio with proper sterilization protocols.
  • Consultation – Schedule a consultation to discuss your design ideas and make adjustments before getting inked.

Pain Levels and Healing Process

Pain Levels

  • The ribcage, spine, and hands are among the most painful spots for a tattoo.
  • Arms, thighs, and back tend to be less painful due to thicker skin.

Healing Process

  • Week 1-2: The tattoo will scab and peel—avoid picking at it.
  • Week 3-4: The skin will continue to heal, and the colors will settle.
  • After 1 Month: Your tattoo should be fully healed, but proper aftercare will keep it looking vibrant.

Phoenix Tattoo Color vs. Black and Gray

Colored Tattoo

  • Uses reds, oranges, blues, and purples to create a fiery and eye-catching look.
  • Great for those who want a vibrant and energetic tattoo.

Black and Gray Tattoo

  • Uses shading and linework to create depth without color.
  • Best for those who prefer a timeless and subtle design.

Maintenance and Aftercare Tips

To keep your phoenix tattoo looking fresh:

  • Moisturize regularly to prevent fading.
  • Avoid direct sunlight and use SPF on your tattoo when outdoors.
  • Do not scratch or pick at scabs during the healing process.
  • Stay hydrated and maintain healthy skin to preserve tattoo vibrancy.

Final Thoughts and Call to Action

A phoenix tattoo is more than just body art; it is a symbol of strength, renewal, and personal transformation. Whether you opt for a bold colorful design or a minimalist black-and-gray piece, your phoenix tattoo can be a powerful representation of your journey.

Frequently Asked Questions

1. What does a phoenix tattoo represent?

A tattoo symbolizes rebirth, resilience, triumph, and transformation.

2. Is a phoenix tattoo suitable for both men and women?

Yes! The design can be customized to suit any personal preference.

3. Does a phoenix tattoo require a lot of maintenance?

Like all tattoos, it requires moisturizing and sun protection to maintain its vibrancy.

4. How long does it take to get a phoenix tattoo?

It depends on size and detail—small tattoos may take an hour, while large back pieces can take multiple sessions.

5. What is the best placement for a phoenix tattoo?

Popular placements include the back, arm, chest, thigh, and sleeve.

🚀 Ready to get inked? Share this article, drop your questions in the comments, or book a consultation with a top tattoo artist today!

Continue Reading
Click to comment

Leave a Reply

Your email address will not be published. Required fields are marked *

Fashion

Hair Transplant Cost: Pricing, Factors & What to Expect

Published

on

Hair Transplant Cost

Hair loss affects millions of people worldwide, leading many to consider a hair transplant as a permanent solution. But one of the most common questions is: How much does a hair transplant cost? The price varies depending on several factors, including the type of procedure, clinic location, and the extent of hair loss. In this guide, we’ll explore the costs, influencing factors, and what to expect from the procedure.

How Much Does a Hair Transplant Cost?

The cost of a hair transplant typically ranges between $4,000 and $15,000 in the United States. However, prices can be lower in countries like Turkey and India, where high-quality procedures are available at a fraction of the cost.

Average Hair Transplant Costs by Country

CountryAverage Cost (USD)
USA$4,000 – $15,000
UK$5,000 – $12,000
Turkey$1,500 – $5,000
India$1,000 – $4,000
Canada$6,000 – $14,000
Australia$5,500 – $13,000

Factors That Influence Hair Transplant Cost

1. Type of Hair Transplant Procedure

There are two primary types of hair transplant methods:

  • FUE (Follicular Unit Extraction): Individual hair follicles are extracted and implanted. Less scarring, but more expensive.
  • FUT (Follicular Unit Transplantation): A strip of scalp is removed and implanted. More affordable but leaves a visible scar.

2. Number of Grafts Needed

Hair transplant costs are often calculated per graft. On average, a single graft costs between $2 and $10, and patients typically need between 1,000 to 4,000 grafts, depending on their level of hair loss.

3. Surgeon’s Expertise and Reputation

Experienced, board-certified surgeons charge more due to their expertise and success rates. A highly skilled surgeon can deliver natural-looking results, making the investment worthwhile.

4. Clinic Location

Clinics in major cities and developed countries generally charge more due to higher operational costs. Many people travel to countries like Turkey for affordable yet high-quality procedures.

5. Additional Costs

Aside from the procedure, you may incur costs for:

  • Consultations
  • Pre-operative tests
  • Post-surgery medications
  • Follow-up sessions

Are Hair Transplants Covered by Insurance?

Most insurance companies do not cover hair transplants as they are considered cosmetic procedures. However, medical financing options and payment plans are available at many clinics.

Is Traveling Abroad for a Hair Transplant Worth It?

Many people opt for medical tourism in countries like Turkey, where clinics offer packages that include:

  • The hair transplant procedure
  • Hotel accommodation
  • Airport transfers
  • Post-surgery care

This can significantly reduce costs while ensuring high-quality results.

Conclusion

The hair transplant cost varies widely based on location, procedure type, and surgeon expertise. While it can be expensive, the long-term benefits often outweigh the costs. If you’re considering a hair transplant, research reputable clinics and consult with specialists to determine the best approach for you.

Frequently Asked Questions (FAQ)

1. How long does a hair transplant last?

A successful hair transplant is permanent, as transplanted hair follicles continue to grow naturally.

2. Is the procedure painful?

Hair transplants are performed under local anesthesia, making them virtually painless. Some discomfort may occur post-surgery.

3. How soon will I see results?

New hair growth starts around 3-6 months post-procedure, with full results visible in 12-18 months.

4. Can women get hair transplants?

Yes, hair transplants are effective for both men and women experiencing hair loss.

Continue Reading

Fashion

What Is Builder Gel? Benefits, Application & Tips

Published

on

Builder Gel

A thick, self-leveling nail-sculpting gel is builder gel. It adds strength and structure, making it completely unlike regular gel polish: it is valuable for lengthening the nail, repairing damage, or providing a solid foundation for nail art.

It cures under a UV or LED lamp and creates a hard, durable finish. Ideal for overlays on natural nails and for building out extensions using forms or tips, builder gel is the essential item for anyone looking to take care of their nails very seriously and those aesthetics.

Benefits of Builder Gel

Title act gives to nail lovers the mania of gel. Here are some of the best benefits:

Stronger Nails: Add a layer of protection over the natural nail to keep it from breaking or peeling.

Length Customization: Ideal for creating sculpted or added lengths.

Natural Finish: Gives a much smoother and sleeker appearance than acrylics.

Flexible but Strong: Probably won’t crack or lift.

Perfect Base for Nail Art: An awesome canvas for intricate designs.

Builder gel is the right and most civil answer to those people who would still wish to have a sleek, healthy, and long-lasting professional manicure, but possess brittle or weak nails.

Builder Gel vs. Acrylic vs. Gel Polish

Understanding the difference between builder gel and other products is key to choosing the right one for your needs.

FeatureBuilder GelAcrylic NailsGel Polish
DurabilityHighVery HighMedium
FlexibilityModerate (less brittle)BrittleVery Flexible
CuringLED/UV lampAir dries with monomerLED/UV lamp
Application EaseIntermediateRequires experienceBeginner-friendly
OdorLowStrong chemical smellLow
Ideal ForStrength & structureDramatic length & shapeColor & shine only

Conclusion: Builder gel hits the sweet spot between strength and natural appearance.

Types of Builder Gel

There are a few variations of builder gel, each with its unique features:

1. Hard Gel

  • Cannot be soaked off with acetone.
  • Needs filing for removal.
  • Best for long extensions.

2. Soft Gel (Builder in a Bottle or BIAB)

  • Can be soaked off.
  • Easier to apply.
  • Ideal for overlays and short extensions.

3. Clear, Pink & Nude Gels

  • Clear: Great for base layers or encapsulating nail art.
  • Pink/Nude: Perfect for a natural nail look or French manicures.

How to Apply Gel Step-by-Step

So, here are the steps involved in using gel.

Step 1- Preparation of nails

Cuticles should be gently pushed back. The natural nail should be filed and shaped. Buff to get rid of the shine. Cleanse with nail cleanser or alcohol.

Step 2: Apply Dehydrator & Primer

The dehydrator removes those oily residues to allow the best adhesion of gel.

This is the acid less primer which preps the surface achieving best bonds.

Step 3: Base Coat

Apply a thin layer of gel base coat. Cure under LED lamp for 30-60 seconds.

Step 4: Application of Builder Gel

Using a gel brush or bottle, apply a small bead of builder gel. Do not brush it on; float the gel over the nail, guiding it into place.

Turn hand over for 10 seconds to allow self leveling. Cure under LED/ UV lamp (30-60 seconds for each layer).

Step 5: Build Apex (If Desired)

Apply a second coat concentrating mostly on that soft apex (high point) for strength.

Cure it again.

Step 6: File & Shape

Shape with a nail file or e-file. Buff the surface for smoothness.

Step 7: Top Coat

Add a top coat for shine and protection. Final cure.

Tips for Long Lasting Results

Avoid too much product, thin layers make it all. Don’t skip cuticle prep to avoid lifting. High-quality LED/UV type lamp should be used for curing. Seal at each free edge of the layer against chipping. Allow each layer to be self-levelled before curing.

Common Mistakes Using a Gel

Builder gel can be tricky to master if you are not familiar with it. Avoid these blunders:

Missing Prep: Oils or residue will cause lifting.

Application Too Thick: Possibly cause bubbles or cracking.

Curing Time Incorrect: This will lead to under-cured, soft nails.

Not Building an Apex: The structural strength is reduced.

Over-filing: Weakens the nail and ruins the shape.

Removing Gel

It can be safely removed such that it does no damage to nails, and also the next set looks good too.

For Gel Soft:

Gently file top coat, soak some cotton in acetone and wrap nails with foil.

Wait for 15-20 minutes and use a wooden stick to scrape off the softened gel carefully.

Buff, cuticle oil.

For Gel Hard:

Most of the gel is filed down with an e-file or hand file.

Avoid filing the natural nail underneath.

Once thin, switch to buffer.

Hydrate after.

Final Thoughts & Call To Action

Builder gel is a powerful addition to your nail toolkit. Whether you’re a beginner exploring at-home manicures or a pro nail tech elevating your craft, builder gel offers versatility, strength, and a polished finish that lasts.

FAQs

Q1: Can builder gel use on natural nails?
Definitely! It is entirely ideal for strengthening natural nails without any extensions.

Q2: How long does builder gel last?
Usually 2-4 weeks, depending on application, nail growth and lifestyle.

Q3: Can regular polish be applied over builder gel?
Of course. Builder gel is a great base for any polish.

Q4: Are nails safe with builder gel?
When put on or off properly, it is totally safe and even could protect your nails from damage.

Q5: Can beginners use builder gel?
Yes, especially soft builder gels. Like BIAB, short overlays are recommended before using extensions.

Continue Reading

Fashion

Ice Cream Haircut Trends: Sweet Styles for All Ages

Published

on

Ice Cream Haircut

If you’re searching for a hairstyle that is fun, fresh, and a little wild, the ice cream haircut is the whimsical trend that has taken barbershops, salons, and social media feeds over the world. With bold colors, layered textures, and sometimes even pictures or designs inspired by ice cream, this fun haircut is made to be about more than just style; it’s meant to make a statement.

Whatever the case-from a parent looking to consider painting a silly cut on their child to the bold self-expression of the owner-the following is everything there is to know about the ice cream haircut and how to wear it.

What Is an Ice Cream Haircut?

The term ice cream haircut might sound a tad odd at first-but it’s exactly what it sounds like: a haircut inspired visually by the ice cream cone, the swirls, the colors, and the scoops.

Two main interpretations exist:

Colorful, Fun Designs: These haircuts are pastel or bright colors resembling ice cream flavors, adorned with either swirled patterns or textures akin to scoops.

Kids’ Haircuts: Some salons associate ice cream haircuts with kids’ haircuts and throw in a treat afterwards to distract from the fear of the haircut.

In any manner, all talk about joy, color, and fun.

When Did the Ice Cream Haircut Trend Begin?

While dessert-inspired designs were being showcased by stylists on TikTok and Pinterest, the trend began gaining momentum when the bold designs and colors stole the attention of:

Creative hair artists

Trend-minded teens and tweens

Parents wanting a fun and less scary haircut experience for kids

Ever since, the trend has taken over salons worldwide, with stylists adding their own interpretations with colors, clippers, and 3D designs.

Ice Cream Haircuts for Kids

Kids Love It:

Makes getting a haircut fun rather than scary.

Salons sometimes give real or plastic ice cream after the haircut.

Kids can choose their “flavor”—soft pinks, blue, or green.

Child Styles:

Light swirl designs on the sides

Temporary hair chalk or spray color

Cartoon proclivities to cut shapes and soft curls

Some salons specializing in themed cuts offer organic, kid-safe, washable dyes for easy, short-lived, no-maintenance looks.

Ice Cream Haircuts for Kids and Teens

Teenagers and adults have embraced this trend as a way to showcase individuality and style. Among creative industries in music, fashion, and digital content, these trends have found circulation.

Teeny-Like Things:

Sherbet colors, loud color block

Undercuts with shave designs in ice cream scoops;

Half-and-half pastels: mint and lavender;

For Grownups:

Tasteful balayage in “strawberry” or “vanilla bean” tones

Swirly ombres

Splain with cone-inspired sideshow and bright tips

The ice cream haircut can be as loud or subtle as you like—making it versatile for all ages.

Most Popular Ice Cream Haircut Designs

Here are some trending ice cream haircut ideas seen in 2025:

Swirled Scoop Fade

    A barber’s favorite: the sides are faded with spiral “scoops” carved in, dyed pastel pink or mint.

    Triple Flavor Layers

      Bob or layered cut dipped in three colors-chocolate brown, vanilla blonde, and strawberry pink.

      Cone-Inspired Undercut

        The underlayer of hair is shaved into a triangle pattern, colored as that of an ice-cream cone.

        Rainbow Sherbet Bob

          Soft chin-length bob with blended-orange, green, and raspberry shades.

          Soft Serve Ponytail

            High ponytail with tight curls or waves, dyed in creamy whites and pastels, giving the illusion of soft serve.

            These styles perfectly combine the finesse of a cut and bright colors that resemble freshly scooped ice cream.

            How to go about getting an ice-cream haircut

            The Process:

            Find Your Specialist: When it comes to the final look of color and styling, find a colorist or a barber who has experience with creative or fantasy hairstyles.

            Consultation and Customization: Pick your “flavors” (colors), patterns, and levels of boldness.

            Prep the Hair: Healthy-looking hair takes better dye. Get your hair professionally masked or treated in the days leading up to your appointment.

            Cut + Color: Assuming there are no hitches in the trip, the process will take approximately 2-4 hours based on its complexity.

            Finish and Style: The finale may feature curls, waves, or texturing to resemble more of a “scoop” effect!

            And it goes without saying that you should bring some reference images and have a thorough discussion with your stylist.

            Maintenance and Hair Care Tips

            An ice-cream haircut can definitely demand upkeep, particularly when dyed. Here are ways to maintain this hulk for that extra buzz:

            Hair Care-Fundamentals:

            Color-Safe Shampoo: Should be sulfate-free for the protection of bright dyes.

            Deep Conditioner: Keeps the hair soft and moisturized.

            Dry Shampoo: Preserves the color between washes.

            UV/Heat Protection Spray: Avoids fading due to sun exposure and styling tools.

            Tips:

            Get touch-ups every 4 to 6 weeks

            Avoid styling with heat daily

            Rinse hair with cold water

            Care helps your ice cream hair look fresh…not melted.

            Pros and Cons of Ice-Cream Haircut

            Pros:

            Intriguingly personalized and fun

            Good for conversation (or social media) when one gets it.

            Allows for creative self-expression

            Makes kids excited over haircuts!

            Cons:

            Not always work-appropriate

            Maintenance can be a tad troublesome

            Vivid dyes can do their bit of harm over time

            Not very good for fine or thin hair types

            Strike a balance between creativity and practicality to find the one that works for you.

            Influence of Celebrity and Social Media

            The ice-cream haircuts have thus been greatly embraced by many influencers and celebrities:

            Billie Eilish: With her half-neon, half-black looks representing the sherbet hues.

            Doja Cat: Has been known to wear interesting pastel wigs and weird buzz cuts.

            TikTok Creators: The trendiest creators showcase rainbow fades, ice cream swirl patterns, and DIY tutorials.

            These influential personalities motivate thousands to confidently try creative designs.

            Conclusion

            The ice cream haircut is more than just a playful hairstyle—it’s a deliciously creative form of self-expression. Whether you’re going for pastel sherbet waves, an undercut cone design, or just adding some swirl to your child’s next trim, this trend offers something fresh, bold, and undeniably fun.

            FAQs About the Ice Cream Haircut

            Is the ice cream haircut just for kids?

            No! While it’s popular with children, many teens and adults enjoy this trend too—especially those in creative communities.

            How long do the colors last?

            Most semi-permanent colors fade after 4–6 weeks, but can last longer with proper care.

            Can you get an ice cream haircut without dye?

            Absolutely. You can stick to cuts, textures, and patterns alone. Temporary hair chalk or clip-ins are also great alternatives.

            Is the haircut damaging?

            The cut itself isn’t—but repeated bleaching or dyeing can be, so use conditioning treatments and avoid over-processing.

            How much does it cost?

            Prices range from $30 for a simple child-friendly cut to $150+ for a full-color artistic design.

            Ready to try it out? Visit a creative stylist near you or explore inspiration on Instagram and TikTok. Don’t forget to share your new look with the world—you might just inspire the next trend!

            Continue Reading

            Trending