
Wolves are majestic and powerful creatures, making them a popular subject for artists of all levels. Whether you’re sketching a simple outline or creating a detailed, lifelike portrait, drawing a wolf requires an understanding of anatomy, fur texture, and shading techniques. In this guide, we’ll walk you through the process of a wolf drawing, from basic shapes to advanced details, helping you refine your skills and create stunning artwork.
Understanding Wolf Anatomy
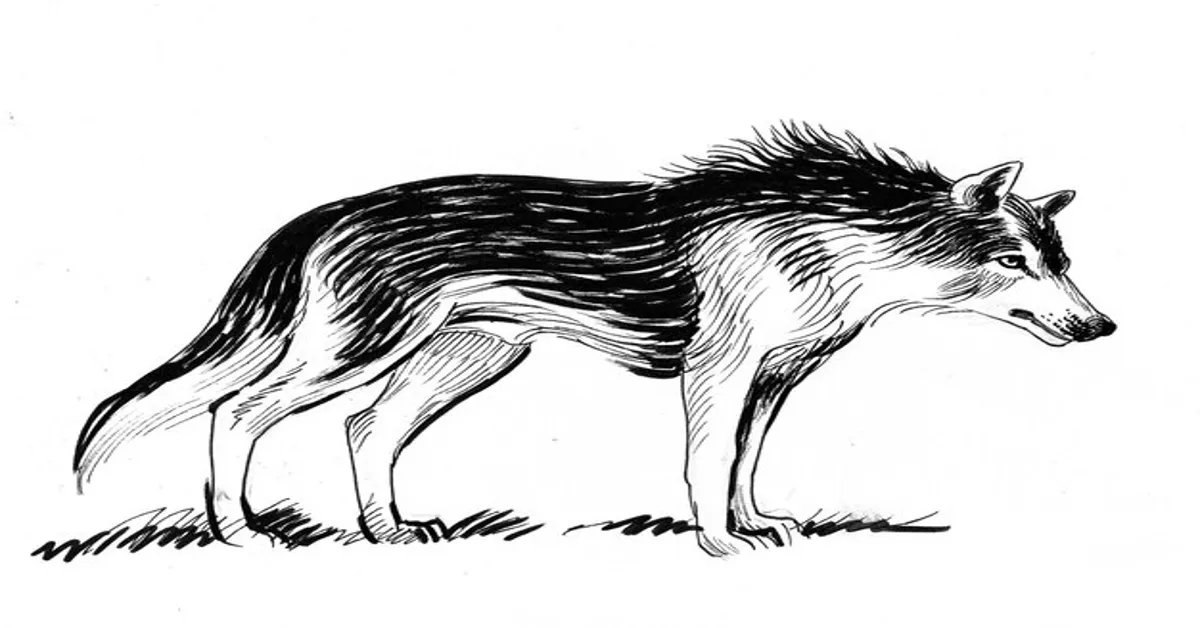
Before you start wolf drawing, it’s essential to study a wolf’s physical features. Wolves have strong, muscular bodies, elongated snouts, and thick fur that changes depending on the season. Key anatomical aspects to focus on:
- Head Shape: Wolves have broad foreheads and tapered snouts. Their ears are triangular and sit high on the head.
- Body Proportions: Compared to domestic dogs, wolves have longer legs and a lean, powerful build.
- Fur Patterns: Wolves have layered fur with different textures, requiring special shading techniques to capture depth and realism.
Observing reference images and studying real-life wolves will help you achieve accurate proportions and details.
Materials You Need for Wolf Drawing
To create a well-detailed wolf drawing, gather the right materials:
Basic Sketching Supplies
✔ Graphite Pencils (2H, HB, 2B, 4B, 6B) – For light outlines and deep shading.
✔ Erasers (Kneaded & Precision Erasers) – Helps with highlights and correcting mistakes.
✔ Sketchpad (Smooth or Medium-Textured Paper) – Ideal for fine details and shading.
Advanced Tools for Realism
✔ Blending Stumps or Cotton Swabs – To smooth out fur textures.
✔ Fine-tipped Ink Pens – Great for adding definition to fur and facial features.
✔ White Gel Pen or Chalk Pencil – For creating light fur highlights.
Step-by-Step Wolf Drawing Tutorial
Step 1: Sketch the Basic Shapes
- Start with a circle for the head and an oval for the body.
- Add guidelines to define the snout, ears, and legs.
Step 2: Outline the Facial Features
- Draw the eyes slightly slanted for an intense, wild expression.
- Shape the nose and snout, ensuring symmetry and proportion.
Step 3: Define the Body Structure
- Use curved lines to create the neck, legs, and tail.
- Keep proportions accurate by referencing real wolf images.
Step 4: Add Fur Texture and Details
- Use short, quick strokes to build the fur layer.
- Pay attention to fur direction, especially around the face and neck.
Step 5: Final Touches and Shading
- Deepen shadows using 4B or 6B pencils for realism.
- Blend areas where fur is softer and add highlights for contrast.
Shading and Fur Techniques
To make your wolf drawing more lifelike, use these shading techniques:
✔ Hatching & Cross-Hatching – Creates depth and shadow using parallel lines.
✔ Blending & Smudging – Softens fur texture for a realistic look.
✔ Layering Pencils – Build up darker areas gradually for natural shading.
Highlighting the Eyes
- Wolves have reflective, intense eyes. Use a white gel pen to add tiny highlights for a glossy effect.
Common Mistakes and How to Avoid Them
🚫 Mistake 1: Overly Rounded Snouts – Wolves have elongated, narrow muzzles. Use guidelines to maintain proportion.
🚫 Mistake 2: Uniform Fur Length – Vary fur strokes to create a natural look. Longer fur appears around the neck, while shorter fur is on the face.
🚫 Mistake 3: Flat Eyes – Add highlights and depth to make the eyes look lifelike.
Conclusion
Drawing a wolf requires patience, attention to detail, and practice. Whether you’re a beginner or an advanced artist, mastering the anatomy, shading, and fur texture will help you create stunning wolf artwork.
Frequently Asked Questions (FAQ)
- Q1: How can I improve my wolf drawings?
A1: Practice by sketching wolves from different angles and using photo references for accuracy.
- Q2: What is the best pencil for drawing fur texture?
A2: A mechanical pencil (0.5mm) for fine details and 4B or 6B pencils for shading work best.
- Q3: Can I draw a wolf in digital art instead of pencil?
A3: Yes! Use pressure-sensitive brushes in apps like Procreate, Photoshop, or Krita to replicate fur texture digitally.
- Q4: How do I draw a realistic wolf nose?
A4: Use circular shading for depth, darken the nostrils, and add a slight glossy highlight for realism.
- Q5: What are good reference sources for wolf drawings?
A5: Websites like Unsplash, Pixabay, and wildlife photography blogs provide high-quality wolf images.